I completely redid this thoughtful post about experiencing life for today’s Redo Post. As in, I completely reshaped and rewrote most of it. It’s about 500% better, in my opinion–but check it out for yourself and see what you think!
Tag Archives: beauty
Makeup Box Spring Cleaning

As part of my (endless) organization/cleaning purge, I decided to tackle my makeup collection recently, with some very surprising results. (Bonus: tips for helping you spring-clean your own makeup collection are at the end of this article!)
I had thought my makeup collection was about as streamlined and simple as it could get, since I don’t wear much makeup these days anyway. But I noticed that there were a few products that I wasn’t using as much. So, I literally took the organizer that serves as my makeup storage and dumped it out on the bed to sort through it…and this is what happened next:
Products Before the Purge

Lip glosses (yes, yes, I know, one girl does not need so many! LOL)

Lipsticks (can you tell lip products are my favorite makeup yet?)

Face products (foundation powder, blush, bronzer)

Eye products (eyeshadow, liner)
The Purging Process
Once I had sorted each category, I took a long, hard look at each product. Was I using this? Was it still safe to use? Did it work like I wanted?
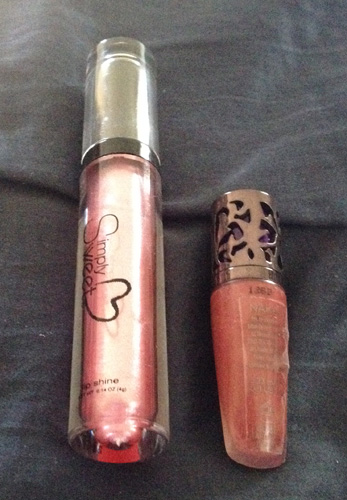
One thing I saw was that several of my lip glosses had begun to separate and change color slightly in the tube. Yuck! (The pictured lip gloss was bought in 2011–definitely wayyyyy too old to be using!)

This lip palette, for instance, was bought back in 2007, according to my note in Sharpie on the bottom of it. Yikes! (This is a really handy tip for keeping track of how old your makeup is–note the month and year on the bottom of it when you get it, and then you’ll know when it’s too old to use!)

Some of the products, like this mini-makeup kit, have been gifts–and gifts are especially hard for me to get rid of because I’m very sentimental. But in this case, this kit has been sitting in my box for at least the last 4 years…:/
I was REALLY tempted to quit in the middle of this purge, to just keep all of the makeup, but when I realized how old some of it was, I knew I couldn’t in good faith keep putting that on my face. Makeup definitely doesn’t last forever! So I set my mind to be ruthless about getting rid of the oldest products, the products I didn’t use, etc. (I don’t wear a lot of makeup, so I didn’t need all of them anyway.)
The Results
A MUCH-reduced gloss collection, taking out all the ones that were now too old to use…

And a little smaller lipstick collection to match 🙂

I pared down all the eyeshadow palettes to the one I really love and use the most…

…and I kept the one eyeliner I have (though I don’t break it out very often).

I took out the foundation powders that I haven’t used since I graduated college in 2007 (seriously!), but I swapped in a couple of the lip stains to see if I could use them as “cream blushes.” (Note: you can’t really blend them well enough to make them work, sadly.)

A couple of trusty tools round out my new, much lighter makeup collection.
What I Kept and What I Got Rid Of
Just to show you exactly how much I got rid of, here’s the “After” picture of my makeup organizer:

And here’s the basket of stuff that went away:
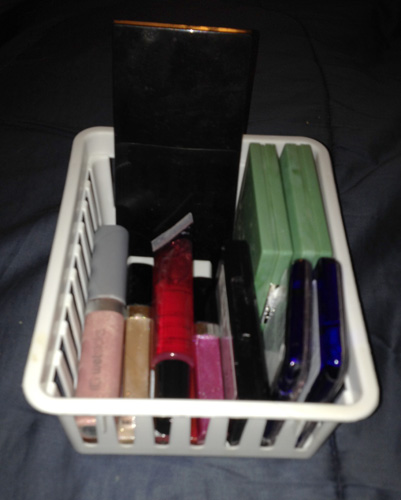
Yep, I got rid of about half my makeup collection in one fell swoop! Pretty amazing for this hoarder in rehab! LOL
To Purge Your Own Collection
- Mark each makeup piece with the date you first used it so you know when to throw it out. (This is SO helpful!) Refer to this article for when to throw away various makeup products.
- Check each product for changes in texture, smell, or application; if it looks “goopy,” smells weird, or doesn’t seem to have the same “oomph” that it used to, it’s probably gone bad.
- Be ruthless when deciding whether to purge an item. Are you REALLY going to use that product if you keep it, or are you keeping it to justify the expense of it? (I kept falling into this trap during the makeup purge, and I had to keep thinking, “Is this something I REALLY love and use?”)
The Pros and Cons of Straight Hair
There are quite a few blog articles out there about dealing with curly hair, but not a lot about straight hair, I’ve noticed. Most folks believe that curly hair is the harder type of hair to deal with, whereas straight hair seems “easier.” As an owner of straight hair, I believe I may be able to set the record straight (hee hee) about how it is to live with straight hair (and to love it, in fact!).
A Little Background, Please
I’ve had stick-straight, fine hair my entire life, and up until a few years ago, I despaired of being able to do anything with it. With my oval face shape and curvier body size, big, glossy, voluminous curls looks REALLY great on me…BUT they take many hours and lots of product to achieve. (And even then, the curls aren’t guaranteed to stay. See: prom night, when I let down my sponge-rollers after 17 hours of letting my mousse- and gel-soaked hair dry in them…and promptly saw that hard-won curl relax into straightness again. Much ARGH.) And what about the Great Brillo-Pad Spiral Perm of 1991? Let’s just not go there. :S
But a few years ago, I realized that even though I didn’t have the big amazing curls I thought I wanted, I did have something quite lovely in its own regard; straight, shiny hair.

This is how my hair dries naturally, with no product in it at all–glossy, smooth, and straight. For years I bemoaned the fact that I could do nothing “cool” with my hair…not realizing that this style was “cool” in and of itself. There are curly-haired girls who get up extra-early every morning and work for two solid hours to get their hair to look like this (much to my surprise!).

I’ve generally kept my hair long and center-parted like this, and so I’ve ended up with a head of fairly easy-care hair, quite by accident. Many women cannot say that; they continue to fight their natural texture every day, as I did for several years. I suppose the big difference is that I finally got tired of fighting my hair texture and decided to run with it instead.
So, without further ado, I present to you “The Pros and Cons of Straight Hair;” straight-haired girls will probably nod and laugh, and curly-haired girls may just sit and wonder at how the “other half” lives. LOL
| Pros of Straight Hair | Cons of Straight Hair |
|---|---|
|
|
What do you think? Have I hit the nail on the head (or the hair)? 😛 Let me know in the comments!
Why I don’t worry about my eyebrows
Amid all the beauty articles you’ll see me post every now and again, there’s one topic you’ll never see me cover: eyebrows. You know why? Because I, unlike so many girls and young women my age, have never and will never pluck my eyebrows to shape them. It’s just a part of the typical female beauty routine that I have never adopted.
In thinking about this issue, I realized there was a little more to it than just not liking to pluck eyebrow hairs out. It has more to do with my philosophy of beauty, which is vastly different from the beauty industry’s philosophy of beauty (not to mention society at large). Read on, to find out how a simple pair of eyebrows could make such an elegant point.
How My Brows Actually Look
As evidence of my unplucked eyebrows, I have a few pictures of myself, with no makeup and no retouching:

Barring the fact that you can tell I haven’t slept right in several years days (LOL), my eyebrows are thick and nearly-black, going almost straight across rather than having the thin, graceful arched shape so coveted in the beauty industry over the last several decades.
Every eyebrow article I read subtly tells me that I, too, should want those perfectly groomed and plucked brows for my own face. It’s almost like your face isn’t “feminine” enough without plucking these hairs out of your face every week, or having them waxed off every few months. But I just haven’t done so. Being as squeamish about pain as I am, it seems ludicrous to inflict such pinching pain on myself for a goal that I’m not even interested in.
Now, why would I not be interested in such a beauty goal? Because when my eyebrows are taken in context with the rest of my face, as seen below without glasses and with glasses…

|
 |
…they actually look pretty normal, fairly well-scaled to the rest of my facial features. True, they’re thick and straight, and some kids I went to school with used to pick on me for having “guybrows,” but they do what God intended them to–namely, to keep sweat out of my eyes (which is very handy during Zumba).
The Eyebrow Epiphany
I used to think about “getting my brows done” (as it’s usually called), but I don’t anymore. And I think this whole eyebrows thing has led me to an epiphany about beauty:
Beauty is not for other people, but for the self.
If you think about it, it’s true. Each of us are the only ones who know what that makeup product feels like on our faces, what those false lashes feel like when they’re glued to our eyelids, how much those eyebrow hair roots can hurt when they’re plucked out with tweezers. Isn’t it, then, up to us which products we use and which beauty routines we do, rather than depending on someone else to tell us “what we SHOULD be using” and “what we SHOULD be doing?”
And yet, the beauty industry–and modern society as well–does not think that way. In most people’s eyes, beauty products and routines are used to visually impact other people, not to make ourselves happier…in effect, saying that our outward beauty is solely for the visual consumption of others.
I don’t buy into that line of thinking anymore; I’ve had my turn trying to “fit in with the crowd,” beauty-wise, and I just don’t. I would rather spend my time using products and doing routines that make ME feel good about ME. Thus, why I’ve never touched my eyebrows with a tweezer, but instead use hand softeners, scrubs, and lotions to make my hands feel baby-soft after a good workout.
People might even judge me through this blog post, thinking “Why would you ever let yourself look that ugly?” or “You ought to shape your brows, you’d look so much better,” but neither opinion really matters. After all, they’re my brows on my face–if some folks don’t like them, that’s perfectly okay, because my brows are not on their faces and they don’t have to live with them. My beauty routine is for me and me alone, and I think more girls and women have a right to think that way as well.
I’m not saying that we all throw down our tweezers and stomp ’em–if you love to keep your brows groomed and plucked because it makes you feel better, then that’s awesome; keep doing it. But if you’re clinging to old beauty routines and products just because some expert said you ought to or because your friends all do it, then maybe it’s time to reevaluate your beauty thinking and start doing only the things that make you the happiest about your appearance. After all, it’s your appearance–if others don’t like it, they ain’t got to live with it!
Beauty Hack: Sprayable Conditioner
It never failed: every time I went to put conditioner on my hair in the shower, I’d inevitably end up with a glob of it refusing to wash out of my hair properly. It got to where I quit even using conditioner for a while, because I was tired of my straight, medium-fine hair looking flat and greasy even right after washing. No matter how little I used, it never seemed to wash out effectively, even if I just used it on the ends of my hair. It just wouldn’t “spread” right on my hair, somehow.
The A-HA! Moment
Before styling my hair one morning, I sprayed in a little leave-in conditioner (which had been my fallback product since the in-shower conditioner wasn’t working out so great). “Man, I wish the bottled conditioner was this easy to apply,” I found myself thinking. “Wish I could just spray it in and wash it out when I was ready.”
And then, it hit me: haven’t I seen spray bottles on sale, in beauty supply stores if nothing else? Couldn’t I just put my conditioner in a spray bottle like those?
The Hack in Progress

|
I went out to my local Sally Beauty Supply and picked up three of these little spray bottles, meant for travel size products (available online as well as in-store). Then, I went home to try out my idea.
The first run-through of my idea didn’t go quite as well as I thought–the conditioner seemed too thick to be able to spray that well. Then, I realized that I had a little room in the top of the spray bottle; I added a little tap water, shook it up, and voila, I had a sprayable conditioner! |
How It Works Now
I eventually used all three spray bottles for my various shampoo-matching conditioners, and I can say now that it’s made my conditioning time a lot simpler. Not only do I use less conditioner, leading to less greasy strands, but it spreads more evenly on the hair and washes out more effectively than it ever has before.
For general use, I spray a few sprays of conditioner into my hand, rub my hands together, and then run my hands through the midlengths and ends of my hair. I find that the spray bottle makes it easy to add just a little more conditioner to my hand without glopping out a whole bunch like my conditioner bottles usually did. (If you trust your aim, you can spray directly into your hair for even easier application!)
Spray Conditioner How-To
- Buy or reuse a spray bottle (any size will do, depending on your need). Just make sure that the sprayer is not a “fine mist” one (the conditioner will only gunk it up). Also, if you’re reusing a spray bottle, make sure you wash out and rinse not only the bottle, but the sprayer head as well. You don’t want weird product residue and conditioner mixing together on your head!
- Fill your bottle part of the way with conditioner. If you want a fairly thin, easily-spreadable conditioner, as I did, fill the bottle up 2/3 with conditioner. If you want a little thicker conditioner, fill it up 3/4 with conditioner instead. Don’t go more than 3/4 of the way full with conditioner, though–it won’t spray well if it’s too thick, as I discovered.
- Add in water, leaving a little room at the top for the sprayer head to be put on.
- Once the sprayer head is on and tightened, shake up the bottle really well.
- Ta-da! You have sprayable conditioner, ready for your next shower!
12 Personal Favorite Beauty Hacks
I’m no beauty maven, but I’m still a girl and still want to look good…and I’m used to finding my own solutions for problems and issues. We all like to find shortcuts and lifehacks, even for girly stuff!
Over the years, I’ve found that all of the following hacks have been my mainstays in helping me look put-together without too much fuss–just the way I like it! Read on to discover the little beauty tricks I use just about every day.
Makeup/Skincare Tricks

|
My fix for chapped lips:
|
 
|
Caught without blush? A little rosy lipstick (matched as closely as possible to your natural flush) on your fingertip, blended onto the apples of your cheeks, works just fine. (I start with a tiny amount, as seen in the bottom picture, and build up color until I get the blush color where I want it.) |

|
When I don’t have any actual contouring powder for my cheeks, I sub in a little bronzer, swept with a fluffy blush brush under my cheekbones. (Be careful not to apply too much–you’ll end up with a dirty-looking face if you’re too generous with the bronzer! LOL) |

|
I use a facial scrub once a week, but I do it in the shower, right at the end when the water’s a little cooler, my skin is softened, and my pores are more open–and my skin glows even the next day! (Usually, I follow it up with the moisturizer tip below for even better results. 🙂 ) |

|
Want to moisturize your face even better? Don’t let all the steam escape from the bathroom right after your shower. You can use all that steam and heat to help moisturizer sink in even better.
I usually dry off my face a little, then apply the moisturizer and let it absorb while I dry the rest of me. (This is best done after you’ve put your hair up and out of the way, so you don’t grease up your hair accidentally. Speaking from experience here.) |

|
When I want to subtly highlight my eyelids, I use a metallic cream eyeshadow, applied with my fingertip directly on my bare eyelid. The cream formula warms up and spreads easier with body heat, and it looks more dimensional and pretty instead of glaringly obvious. |

I use the two eyeshadow palettes above to mix my own eyeshadow shades when I want to try a new color, or I just want to match my eyeshadow to my clothing.
Some shades I’ve made:
- Pale blue (sapphire blue + white)
- Forest green (lime green + bit of teal + black)
- Silvery pink (burgundy + white + bit of gray)
- Copper (orange + burgundy)
- Lavender (sapphire blue + burgundy + white)
Hair Tricks

|
If you’re like me and can never get the conditioner distributed through your hair right, a conditioner/water mix in a spray bottle might be just the thing for you. I mixed up about 2 parts conditioner and 1 part water into a spray bottle, seen at left; I spritz the mixture into my palm and rub it onto the ends of my hair for easier/less heavy application. (You can also spray it directly into your hair if you trust your aim–I don’t trust mine. xD) |
 
|
I find that if I match my shampoo and conditioner to the time of year and weather conditions, I end up with a better-looking head of hair right from the shower. In the summer, or in more humid conditions, I choose lighter-weight shampoos (top left picture) and use conditioner more sparingly, just at the ends. In the winter/drier conditions, I choose creamier shampoos (bottom left picture) and use conditioner from the midlength to the ends of my hair. |
 
|
To tailor my shampoo to my hair’s daily needs, I become something of a shower chemist. (LOL) If my hair needs more cleaning power (say, after a workout), I’ll mix my regular shampoo with a bit of clarifying shampoo (top left picture). But if my hair needs a bit of TLC due to weather outside or hard styling the day before, I mix in a little conditioner instead (bottom left picture).
This really seems to help–it makes both the drying and styling process much easier, and my hair feels better to the touch throughout the day. |

|
As a girl with very sleek, very flat straight hair, static and flyaways are a huge problem for me, especially in the dry wintertime–I can’t wear anything on my head without my hair clinging to it like a creepy ex. (It always seems to happen most when I’m nowhere near any styling cream or anything, too!)
To calm my needy hair down when there’s no mousse in sight, I use just a tiny, tiny bit of light hand lotion; I rub my hands together briskly to distribute the product, and then lightly glide my hands over my hair. |

|
I’m not vain about much when it comes to beauty, but I am concerned about doing my hair lasting heat damage. One trick I’ve found is to dry my hair mostly using the “low” setting on my hair dryer–I only blast the fastest hot air for 1-2 minutes, and I only use that setting for the spots that take the longest to dry (for me, that’s the sides and back of my head). This seems to help my hair look shinier when dry, as well as less damaged in the long run. |
Luxe Beauty Products from L’Occitane
I recently had the pleasure of testing a couple of beauty products from L’Occitane, a beauty, haircare and skin-care brand from France. Having heard the company’s name in positive reviews, but never having bought any of their products for myself, I had no experience with their product line until I received an offer to do a sponsored post/product review on my blog. I jumped at the chance to do an honest review for a couple of their products, and I’m very glad I did!
The Products I Tested
I tested the Shea Butter Ultra Rich Face Soap and the Mini Pure Shea Butter tin, both part of L’Occitane’s natural skin care line.
Review: Shea Butter Ultra Rich Face Soap
Since I had oily, acne-prone skin as a teen and still have occasional acne even now in my late twenties, I wasn’t sure how the shea butter face soap would work out. Boy, was I (pleasantly) surprised! Not only did its lather smell good and feel rich and smooth on my face, but my skin felt moisturized even without putting any of my regular moisturizer on. (My skin has gotten drier and much more sensitive as I’ve gotten a little older, so the moisture was welcome, and surprisingly well-received by my usually finicky facial skin.)
Also, a few days before trying this soap, I had suffered an attack of eczema all across my cheeks, which are drier by nature anyhow. An hour after using the Shea Butter Ultra Rich Face Soap for the first time, I felt my cheeks and discovered that the rough patches of skin there felt less prominent than before. Though the soap alone did not completely take away the eczema, it seemed to make my medicated eczema cream absorb and work better–by the evening, the rough patches were GONE.
Review: Mini Pure Shea Butter Tin
For being as small a tin as this is (only .26 ounces!), a dab really will do ya. This pure shea butter is smooth and even on any skin you apply it to, and is in the cutest and handiest travel-size tin you could ever want for your purse or luggage.
I usually hate lotions and creams because of the motor-oil-slick feeling I get on my hands afterwards. But, after warming the tin of balm gently between the palms of my hands for a few minutes, as directed by the packaging, I applied some of the shea butter from the Mini Pure Shea Butter tin to my cuticles and a couple of rough calluses on my fingers. Within 30 minutes, I noticed a velvety difference. The balm felt soft and silky, did not leave a clingy, filmy feeling, and enhanced the natural shine of my nails. (And as of this writing, the calluses on my fingers are less noticeable!)
I’m also wearing a fairly thick coating of the shea butter on my lips as I write this post, and I cannot quit rubbing my lips together to feel how smooth they feel. I typically suffer from cracking, peeling, and bleeding lips on most occasions, and have tried many lip balms and creams; after just one full night and day of wearing this balm, reapplying as needed, I have seen the peeling slow down dramatically, and the cracks do not seem as red. (Not to mention that I used this same balm to tackle a stubborn callus on one of my littlest toes–it has many uses!)
The Bottom Line: Try L’Occitane
From what I can tell by testing these two products, the L’Occitane brand’s glowing reputation is well-deserved. Take it from someone who’s very picky about her beauty routine–this company makes quality products!
Battle of the Beauty Purge, Completed
Last week I wrote about my massive beauty-product purge, ranging from shampoos and conditioners to lipstick and fragrance and everything in between.
This week, I will show you the fruits of that (very very hard) labor, in the form of a much nicer bathroom. Not just showing makeup products, but ALL of the products I reduced and condensed, and the total effect that had on my bathroom.
What Remained After the Purge
Makeup
About four years ago, I quit wearing full-face makeup all the time. Not coincidentally, I started dating my awesome boyfriend of win around that time–as we got to know each other, I found myself not feeling the need to wear much makeup around him, because he was always so positive about my appearance. When we purged the bathroom, I realized I didn’t need all the random makeup I was hoarding; either it was out-of-date, the wrong colors, or it just wasn’t necessary anymore. Thus, my collection was edited waaaaay down, into what you see below.

Clockwise from top left: New York Color Color Wheel Mosaic Powders in Translucent Highlighter Glow (top left) and Pink Cheek Glow (top right); E.L.F. Bronzer in Sun Kissed; Clinique Superpowder Double Face Makeup in Matte Ivory
True story–these four products are all that I use for face makeup these days. (Concealer has either never worked right or I never learned how to apply it without it looking blotchy and fake, so I don’t bother buying it anymore. And I find that the Superpowder does a fair job of covering most flaws anyway. ^_^) The bronzer, blush, and translucent powder over top gives me a naturally-finished look without taking too long.

From left: Revlon Illuminance Creme Shadow in Precious Metals; New York Color Metro Quarter Eye Shadow in South Street Seaport; CoverGirl Eye Enhancers in Drama Eyes #222 (left) and Tropical Fusion* #205 (right). Eye pencil (between the eye palettes) is New York Color Kohl Brow/Eyeliner Pencil in Jet Black.
*unsure of exact product name
Just these four eye palettes make it possible to mix nearly any color I want without having to buy every single shade. I can make a dark green, for instance, by taking the teal shade and adding a little black and a little brown; I can make a light purple by mixing the dark burgundy, the dark blue, and a little white. And, of course, they are all lovely shades to wear on their own. (The cream shadows, at far left, are great highlighters or bases, depending on what I need–they show up darker in this picture than they really are.)

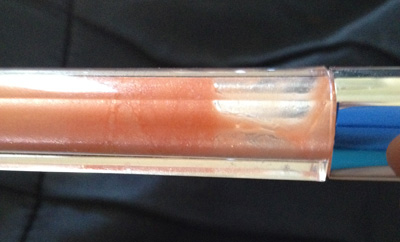
From left: CoverGirl Wetslicks in Shimmershell; L.A. Colors Glossy Lips in Jammin’ Jelly; Neutrogena MoistureShine glosses in Healthy Blush (left) and Berry (right); New York Color lipstick in Ruby #305; Beauty Innovations lip palette, unknown name.
I reduced my lip makeup collection SEVERELY. These are all the lipsticks I own now, and they, like the eye products, can be mixed together to get the precise shade I’m after. I prefer glossier/smoother textures, and so most of my collection focuses around that.
The Glossy Lips gloss (second from left) is not really that dark, by the way–see it in the light, below:
![]()
Bath Products

From nearly a tubful of bottles, we shrunk my impressive shampoo collection down to this small drawer; we got rid of at least 150 shampoo bottles to condense it down to what I really use and like. I’ve got four basic formulas I like: light conditioning, heavy conditioning, super-cleansing, and volumizing. Thus, each of the bottles in this drawer does one of the four functions.

Since I hate having the “extra step” of conditioning in the shower every day, I have considerably fewer conditioners. Most of these conditioners match a super-cleansing or light conditioning shampoo.

I kid you not, we got rid of over 50 different shower gel bottles, and now I have room to spare in this little drawer. I generally like clearer, less-creamy shower gels with light fragrances, so that’s largely what my small collection is about. (I’m also in the process of phasing out shower gels in favor of scented bar soaps, which last longer and are cheaper.)
Fragrances

Okay, okay, I admit it, I like body sprays and scented stuff. And maaaaaybe I could stand to reduce this just a touch more. But considering that we hauled out 2 big black trash bags full of nothing but old perfume bottles… 🙂

I had been storing my sprays and lotions alongside my shower gels in that little drawer. But the drawer was way too small to hold all that awesome in it, and I was always forgetting to use the sprays because they were hidden away. Thus, I got this white-painted metal spice rack from Walmart for about 10 bucks, to create a “fragrance display” in my bathroom.

See? Looks a lot better than them just sitting out on the counter in a big conglomerate mess. (Oh, and the sprig of blue flowers beside them is there just ’cause it’s pretty. ^o^)
Hair Notions and Jewelry
I usually have longer hair most of the time, so I have tons of scrunchies, clips, and smooth bands to craft it into “cool hair,” as my boyfriend describes it. But in order to get my collection into a more manageable size, I had to edit and toss a bunch of stuff.

This is my much-reduced selection of bigger hair notions–I used to have about 3,000 of those big hair clips back in the day. LOL…

…but I still have a ton of little hair notions in the form of tiny clips and bands. What can I say, it’s a work in progress!

And these are all the smaller scrunchies that wouldn’t fit on my big ole scrunchie rack.
“Scrunchie rack?” you say. “What’s a scrunchie rack?”
THIS:

It was a hand-towel rack. I saw the unique, flattened “S” shape of the rack, below…

…and I thought, “Hey, I think I could thread my scrunchies onto that.” So I repurposed it…

…like so. It might look like a confusion of fabric (and it kinda is), but there’s organization there. Now I can see all the scrunchies at once and pick one off fairly easily.
Speaking of racks, here’s the slightly-Asian-inspired jewelry rack I picked up on clearance from Walmart:

Where once my jewelry was in scattered bags all over the house, now it has a permanent (and pretty) home in the bathroom, safely away from hungry sink drains. Awwwh yeah.
Other Items
When I said my boyfriend and I cleaned the bathroom, we cleaned out EVERYTHING and made space for EVERYTHING that was left. Like my soap/razors/hair products drawer:

Uh, yeah, this is slightly still a work in progress. But at least I always know where the soap is now, instead of having to dig through 4 cabinets and 2 drawers!

That’s right, I dedicated a whole bathroom drawer to brushes. And yes, I do use every single one of them, depending on styling needs. No more knocking stuff off the cabinet tops to find that one stinkin’ brush that’s hiding from me!

And because I had no set place for my toothbrushes, cough drops, bandages, etc, I dedicated the drawer on the other side of the sink to hold such supplies. It’s the unofficial “medicine cabinet.” (And yes, I regularly need that many Band-Aids. I am one of the clumsiest, most accident-prone people ever. The first-aid companies <3 me.)
The Proudest Achievement: Organization in the Bathroom
First off, this thing rocks my socks.

It only stands about a foot or so tall, but held within it is all my makeup (top two drawers) and most of my hair notions (bottom three drawers).

Face stuff (plus a few beauty tools)…

…and everything else makeup-y. See? It all fits!
Combine that with the awesomeness of the racks holding my jewelry, fragrances, and scrunchies, and you get this:

…I’m finally bathroom-proud. It may not be the best-looking, it may still be in progress, but I’m using the space a lot better than I ever did before.
And LOOK! I can see the color of the countertops!! That, in itself, is a massive achievement. 😀 😀 😀
The Massive Beauty-Product Purge
I’ll admit it, I’m an OCD hoarder. If you could see my bedroom…well, maybe it’s best if I don’t post such traumatizing, disturbing pictures of disorganization and junk stacks on the Internet. (LOL) And besides notebooks, scraps of paper, and purses, I have also hoarded beauty products most of my life. Hey, having it at home is better than having to go out and buy it, right?
…WRONG. When your bathroom countertops overflow into the sink and onto the floor on a regular basis, and the under-sink cabinets are stuffed full of products whose bottles have ruptured and/or otherwise leaked, you know you’re in trouble.
Yet I let it lie like this for years, stymied, paralyzed. I couldn’t do anything with the junk, even the junk I KNEW was junk, because…well, if I got rid of it, and then I needed it later, I’d have to go out and re-buy it. Torture.
The Breaking Point
The stalemate between me and the growing mess finally broke one spring afternoon in 2011, when I was, ahem, otherwise occupied in the bathroom and had nothing better to do than to stare at the mess covering the countertops.
As I watched, a series of large perfume bottles (Bath and Body Works-sized) slid slowly into the sink, piling up on top of each other like a fragrance avalanche. The noise and rumbling of the perfume bottles set off a couple of smaller avalanches of facial wipes boxes, soap containers, and shampoo bottles, cascading into the floor like so many mountain boulders.
My first instinctive thought was, “…REALLY?” I’d dealt with the mess associated with hoarding most of my life, but I’d never seen a mess move on its own, not like this, anyway.
This had to stop. It was no longer just an innocuous pile on countertops, but a threatening mass that was making it impossible for me to use my own bathroom space, let alone anybody who dared to come into the house. This…HAD to stop. It was beauty-product madness.
The War Begins
My first volley in the war on beauty clutter was to rid myself of all the obviously expired products–all the stuff that had mold growing on it, had exploded, or was otherwise unsuitable for putting on my face or body anymore.
My awesome boyfriend proved his love ten times over by helping me with all of it, since it hurts a lot for me to squat down and/or stand in one place for very long. (He is awesome, focused, logical man, especially when this little bird gets overtired and cranky.) Together, we unloaded the overstuffed cabinets into trash bag after trash bag, discovering the following gems in the process:
- a can of prehistoric hair spray (kidding–it was only from 1996…I think)
- several crushed shower gel bottles
- dozens and dozens of dusty, gummy little-girl hair scrunchies
- more sanitary pads than the world’s women will ever need
- three cream-to-powder foundation palettes which had some kind of horrible splotchy mold on them
- a hoard of toothpaste tubes, which were keeping one of the cabinet drawers from opening AND closing
- a vial of liquid foundation that was literally puke-green in color. It used to be the color of my face, about ten years ago.
- one shampoo bottle that had apparently become volatile and EXPLODED, leaving green slime all over most of the cabinet’s inventory
- a can of brown spray paint that had somehow “eaten” itself and rusted almost completely away. (We were both like, “WHAT is this BROWN POWDER in this CABINET?!” And the smell…*UGH*)
The Hardest Part: Purging What Was “Still Good”
Once we got rid of the obvious trash, which was fairly easy, I faced the largest obstacle: getting rid of stuff that still had life in it, was still usable.
For me, getting rid of still-usable stuff is hard, because I look at the pile of stuff I’m getting rid of and think “wasted money.” It makes me literally sick to think of all the dollars going out the door in trash bags. Thus, another reason why I hoard, I guess.
I started having real trouble with it, was almost too daunted to keep going, until my boyfriend said, “Honestly, honey, how long has it been since you used it? If it makes you happier to keep it, please go ahead–but this doesn’t look like it’s been touched in years.”
My instant argument back was, “Well, I would have used it if I could have FOUND it in this mess!”
“True,” he replied, “but do you have anything that does exactly the same function?”
He had a point. In some cases, I did have something (or several somethings) that fulfilled exactly the same function (like the 7 nail clippers–I wish that was a jest). Knowing that part of my junk problem lay in having multiple copies of the same item was an important key in getting over my attachment to the items I’d bought.
In the case of the nail clippers, I kept 3 of the 7, because one was a specific, larger toenail clipper, one was regular nail clippers, and one was an itty-bitty nail clipper/file combo that I put into my purse. The other 4 went away–2 got given away, and 2, we found, were irreparably broken/rusted anyway, so they were trashed.
Systematically, we hunted through all the stuff. Endless iterations of Night-Blooming Jasmine shower gel and perfume (which I stockpiled because B&BW only offers it twice a year), 10 different Clinique compacts of pressed powder, literal hundreds of lip glosses…all were evaluated, condensed, and the excess removed. (We found that 4 of the jasmine perfume bottles were all just alcohol anyway…no fragrance smell remained. SAD)
The Aftermath
By the time the organizing carnage was (mostly) over, my bathroom cabinets were cleared; their interiors were empty and dusted out, left to air out overnight after long years of being shut away in shame. The countertops were also cleaned and polished up, and new systems of organization went into place atop them, showcasing my jewelry, my fragrance bottles, and my impressive scrunchie collection (hey, I grew up in the 90s, all right?). I also FINALLY had a place for all my makeup–at least, what remained of the huge collection I had (but more about that later).
At last, after years of getting ready (somehow) amid a torrent of products, my bathroom had become a true lady’s dressing room and ablutions room. I finally had room for everything, and everything that I had was stuff I was really going to use and really enjoyed, from shampoos and conditioners to fragrances, from powders to lipsticks and everything in between.
Next Week: The Makeup Survivors
Next week, I’m going to show what remains of the massive collection of old makeup we cleaned out. I went from several LARGE zippered bags of makeup to two tiny drawers-full in a five-drawer countertop organizer…unbelievable as it sounds!
My Style In Pictures

With the advent of Pinterest, we all find it easier than ever to describe our personal styles through pictures. As a plus-sized, partially disabled young woman, I can’t always wear or create all the things I pin (and who can? LOL!), but I’m still drawn to certain fashions, makeup looks, and hairstyles. Thus, my Pinterest boards have become both a realistic portrayal of my personal taste as well as a fantasyland of things I’d love to wear.
Scroll down and see key elements of my style (which I call “Comfortably Classy)! (You can click on the pictures to see these pictures on Pinterest, too!)
Hairstyles

|

|

|

|

|

|

|

|

|
Makeup/Beauty Looks
|

|

|

|

|

|
Jewelry

|

|

|

|

|

|
Clothing

|

|

|

|

|

|

|

|

|
Shoes

|

|

|

|

|

|
See More!
You can find even more examples of my style (plus a ton of life hacks, organization and decor ideas, health tips, etc.) over at my Pinterest!