Tag Archives: makeup

Makeup Box Spring Cleaning

springcleaning
As part of my (endless) organization/cleaning purge, I decided to tackle my makeup collection recently, with some very surprising results. (Bonus: tips for helping you spring-clean your own makeup collection are at the end of this article!)

I had thought my makeup collection was about as streamlined and simple as it could get, since I don’t wear much makeup these days anyway. But I noticed that there were a few products that I wasn’t using as much. So, I literally took the organizer that serves as my makeup storage and dumped it out on the bed to sort through it…and this is what happened next:

Products Before the Purge

glossbefore
Lip glosses (yes, yes, I know, one girl does not need so many! LOL)

lipbefore
Lipsticks (can you tell lip products are my favorite makeup yet?)

facebefore
Face products (foundation powder, blush, bronzer)

eyeshadowbefore
Eye products (eyeshadow, liner)

The Purging Process

Once I had sorted each category, I took a long, hard look at each product. Was I using this? Was it still safe to use? Did it work like I wanted?

ewww
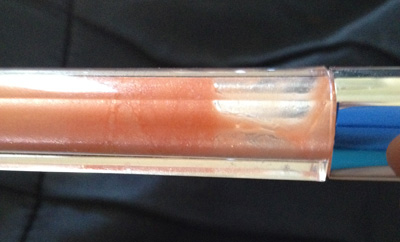
One thing I saw was that several of my lip glosses had begun to separate and change color slightly in the tube. Yuck! (The pictured lip gloss was bought in 2011–definitely wayyyyy too old to be using!)

superoldlippalette
This lip palette, for instance, was bought back in 2007, according to my note in Sharpie on the bottom of it. Yikes! (This is a really handy tip for keeping track of how old your makeup is–note the month and year on the bottom of it when you get it, and then you’ll know when it’s too old to use!)

minimakeup
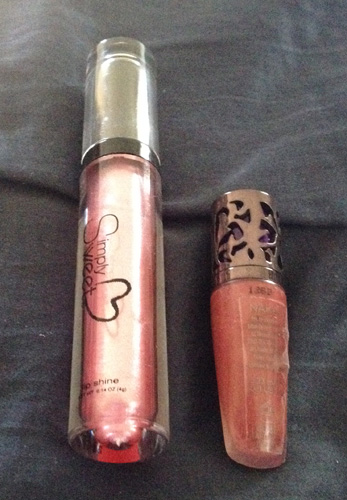
Some of the products, like this mini-makeup kit, have been gifts–and gifts are especially hard for me to get rid of because I’m very sentimental. But in this case, this kit has been sitting in my box for at least the last 4 years…:/

I was REALLY tempted to quit in the middle of this purge, to just keep all of the makeup, but when I realized how old some of it was, I knew I couldn’t in good faith keep putting that on my face. Makeup definitely doesn’t last forever! So I set my mind to be ruthless about getting rid of the oldest products, the products I didn’t use, etc. (I don’t wear a lot of makeup, so I didn’t need all of them anyway.)

The Results

glossafter
A MUCH-reduced gloss collection, taking out all the ones that were now too old to use…

lipafter
And a little smaller lipstick collection to match 🙂

eyeshadowafter
I pared down all the eyeshadow palettes to the one I really love and use the most…

liner
…and I kept the one eyeliner I have (though I don’t break it out very often).

faceafter
I took out the foundation powders that I haven’t used since I graduated college in 2007 (seriously!), but I swapped in a couple of the lip stains to see if I could use them as “cream blushes.” (Note: you can’t really blend them well enough to make them work, sadly.)

tools
A couple of trusty tools round out my new, much lighter makeup collection.

What I Kept and What I Got Rid Of

Just to show you exactly how much I got rid of, here’s the “After” picture of my makeup organizer:

whatikept

And here’s the basket of stuff that went away:

gotridof

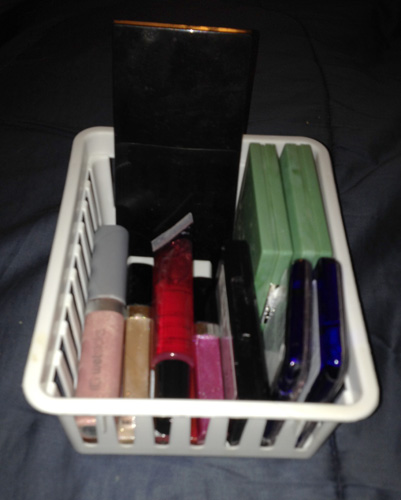
Yep, I got rid of about half my makeup collection in one fell swoop! Pretty amazing for this hoarder in rehab! LOL

To Purge Your Own Collection

  • Mark each makeup piece with the date you first used it so you know when to throw it out. (This is SO helpful!) Refer to this article for when to throw away various makeup products.
  • Check each product for changes in texture, smell, or application; if it looks “goopy,” smells weird, or doesn’t seem to have the same “oomph” that it used to, it’s probably gone bad.
  • Be ruthless when deciding whether to purge an item. Are you REALLY going to use that product if you keep it, or are you keeping it to justify the expense of it? (I kept falling into this trap during the makeup purge, and I had to keep thinking, “Is this something I REALLY love and use?”)

The “Clear” Winner: Desktop Organizer Becomes Makeup Organizer

A couple of years ago, I finally dug into my massive collection of old hair and beauty products and purged about 80% of them. The collection that had once taken up two countertops, dozens of boxes in my closet, and several feet of floor space now fit nicely under the two bathroom cabinets and in a small five-drawer organizer sitting atop the cabinet.

My makeup collection especially saw a big reduction. So much, in fact, that I only had to use two of the five tiny drawers in that organizer to store my makeup.

But there was a problem. Actually, three problems, which showed up in ensuing months:

  • The drawers often got stuck because of a makeup product’s packaging blocking the way
  • Some of the makeup products, especially lip glosses, slowly leaked when put on their sides (the way they had to be stored in this drawer system)
  • The makeup that got accidentally shoved to the back of the drawer never saw usage, because I couldn’t see it/access it anymore

I had to do something about this. I knew I wanted a more open storage system for my makeup, something that I didn’t have to open and close to get to…but I also wanted to be able to see everything in my collection without having to move other things out of the way. Plus, I didn’t want to spend a ton of money on whatever organizing system I got, just in case it didn’t work.

Then, I happened to be at Walmart, when I spotted something in the office supplies aisle:

emptyorganizer
It was a clear desktop organizer, meant for office supplies and the like. I, however, saw it a little differently. I bought it, brought it home, and within about 30 minutes, I had transformed my makeup organization space.

makeuporganizer
BAM!! 😀

makeup-guts-everywhere
Yep, these are all the makeup products I own, and they all fit in this little desk organizer that takes up just under a square foot of space. Amazing, huh?

But even with all this awesomeness, there were a few issues I had to address while I was putting each item into place. Here’s some handy hints for storing your own makeup in such an organizer:

back-big-compartment
1: Big tall compartments, like this one at the back of this organizer, are great for large palettes and tall items (like the eyeliner pencil at left). Don’t put small items (like travel-size lip glosses) in these compartments, because they’ll just fall over and get hidden by bigger items. (Learn from my fail.)

middle-ittybitty-compartments
2: Use the very small but still high-walled compartments for items like lipsticks or other stick makeup that are best stored vertically. For me, this was key, because some of my glosses had begun to leak when stored horizontally; the vertical storage solves that issue! Tiny compartments also help keep the tiniest items from falling over, like those five tiny glosses in the middle compartment.

front-medium-compartments
3: Use medium-sized, flatter compartments for smaller palettes or individual items–here, I’ve used them for blush, bronzer, face makeup, and even my sharpener because I feared the little thing would get lost otherwise. Also, be careful that your smaller palettes don’t get jammed down in the flatter compartments–I had to do some serious prying after my blush compact got stuck in the left compartment. That’s why it’s stored propped up the way it is!

Now that I’ve had my makeup stored this way for about a month, I love it and wouldn’t go back. I can see every product and pull it out easily to use it, and more importantly, nothing gets ignored because the organizer is clear. It makes getting ready a LOT easier–and all because I tuned into my repurposing radar. Neat!

Product Information

organizerlabel
Available at Walmart

My Favorite Beauty Products

myfavebeautyproducts
Though most of my blog posts don’t trumpet my femininity to the heavens, I definitely am a girl–and so, I figured I’d indulge myself in naming some of my all-time favorite beauty products, partially inspired by Jenny’s post about her drugstore beauty haul. (By the way, this post is not sponsored by any company!)

See what products have pleased this incredibly picky girl, below!

Face Products


St. Ives Invigorating Apricot Scrub
niveasoft
Nivea Soft
vaselineliptherapy
Vaseline Cocoa Butter Lip Therapy
naked2
Urban Decay Naked2 Eyeshadow Palette
instantcheekbones
Covergirl Instant Cheekbones Contouring Blush in Refined Rose
medieval
Lipstick Queen Lipstick in Medieval
jeanqueen
Lipstick Queen Lipstick in Jean Queen

With my fair, sensitive yet oily skin, and my desire for a simple makeup routine, I focus more on better skincare and a couple of enhancing makeup products rather than caking on skin-colored makeup. I’ve used St. Ives scrub weekly for years, and Nivea Soft moisturizer is an excellent follow-up to it. (Other than these two products, however, I only use water on my face during the rest of the week–my face breaks out and gets angrily dry if I try to wash it too often.)

The Lipstick Queen lipsticks are the best-pigmented, least-sticky lipsticks I’ve ever used, period (Medieval, especially). I love Medieval’s soft red color–it’s red without being crazily dramatic, while Jean Queen is the perfect pinky-nude color. Plus, Vaseline’s Cocoa Butter Lip Therapy helps my peeling lips (possibly caused by a vitamin B deficiency) during the night. Combine the two and I have radiant, soft, boyfriend-approved lips ALL DAY. Meanwhile, CoverGirl’s Instant Cheekbones blush gives my face a soft lift without looking too made-up, and Urban Decay’s lovely range of metallic eyeshadows lend a pretty highlight to the lids of my deep-set eyes.

Hair Products

weeklydeepcleanse
Pantene Damage Detox Weekly Deep Cleanse

Pantene Classic Care 2 in 1
dove-shampoo
Dove Intensive Repair Shampoo
dove-conditioner
Dove Intensive Repair Conditioner

My straight, medium-fine hair and my oily scalp actually combine to give me easy-care hair. I can pretty much wash, comb, and wear in the summer, and wash, comb, dry and wear in the winter (which is all the styling I care to do, LOL). Thus, my hair beauty routine is focused around great shampoos and conditioners rather than “styling” products.

Pantene’s Weekly Deep Cleanse is just about as great as their discontinued Clarifying Shampoo (which I loved <3), and I use it as my first shampoo in the shower to degrease and prepare my hair. Depending on the time I have to get ready, I can then either reach for my 2-in-1 shampoo or my Dove Intensive Repair Shampoo and Conditioner. Both have wonderful light fragrances and leave my hair looking and feeling like silk, which both my boyfriend and I love.

Body Products

dovesoap
Dove Original Beauty Bar
veneziarosesoap
Venezia Soapworks Rose Soap

Venus Original Razor

Venus Breeze Razor With Shave Gel

Since I’m phasing out shower gels and body washes in favor of cheaper moisturizing bar soaps, I’ve listed my two favorite bar soaps here. Dove’s original white soap has been a go-to product since my childhood, and Venezia Soapworks’ rose soap is a new favorite with the potential for the richest lather I’ve ever seen a bar soap make. As a time-saver, I use my Venus Breeze razor in the shower–I don’t have to buy separate shave cream, AND it’s one fewer thing I have to carry when traveling. My original Venus razor serves alongside a simple bottle of conditioner for longer shave sessions or for touch-ups.

Summary

My pared-down beauty routine may look too simple to some, but these are the products I have personally tested and found to be AMAZING. I have no brand loyalties, and like I said at the beginning of the post, nobody’s paying me to say any of this–I just love these products!