Making beaded jewelry is not just about selecting good beads or perfecting your techniques–it’s ultimately about making beautiful jewelry with lovely beaded patterns.
I don’t claim to be a perfect designer by any means, but I know what kinds of patterns I like to see in jewelry, and that’s how I design my own beaded necklaces thus far. Here are some examples:

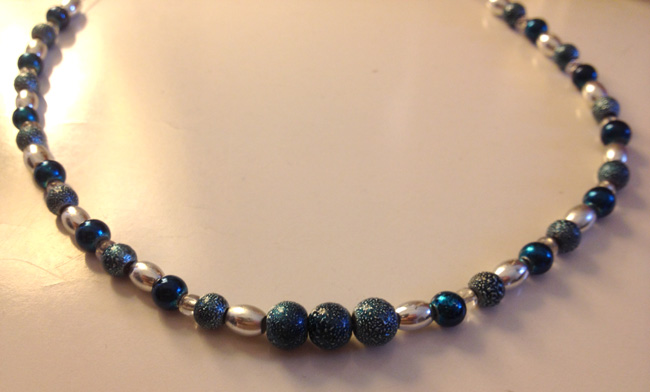
This necklace (which is the slightly-messed-up one from last week) displays a couple of pretty design tactics:
- Symmetrical patterns–the necklace can be flipped left to right with no change
- Colorful beads interspersed with neutral beads (in this case, silver) to help set the colors off
- 3 sparkly beads used at the center of the necklace (bottom center of pic) to draw the light and the viewer’s eye

A little different strategy was employed with this necklace, my first take on using white pearls in a design:
- Vary the sizes and shapes of beads used in a pattern for visual interest in a mono-colored necklace
- Use tiny beads to separate larger beads and make them look like they’re floating
- Let one unusual bead be the center of a symmetrical 5- or 7-bead pattern (you see this twice in the above pic)–surround the unusual bead with more normal beads to let it take the spotlight

- Juxtaposing different finishes of beads in the same color family (here, using lavender) can add a soft effect to your patterns.
- Creating a focal point in the center of your necklace can be just as easy as grouping 3 larger, lighter-finish beads and then surrounding them with smaller, darker-finish beads.
- Patterned or textured beads can add subtle flair when placed alongside smoother beads.
- Don’t be afraid to use oblong and round beads together–oblong beads, especially in clear or neutral colors, can be used as visual “spacers” to make your colorful beads pop more.

(Not sure why this necklace’s beads showed up so green–they’re actually Pacific opal beads, which are blue-green. Oh well!)
- Use smaller beads out at the ends of your beading project, and larger beads toward the middle–that creates a “graduated” effect which looks more graceful.
- Alternate opaque and translucent/sparkly beads for a playful pattern.
Summary
Working with symmetry, different bead textures and shapes, and colors which play well off each other can make any beaded jewelry project lovely. Try it out–just lay a few beads together on a table and rearrange them to your heart’s content. You just might come up with a randomly gorgeous pattern!
One thought on “Beginner Beading, part 3: Pretty Patterns”