Tag Archives: advice

3 Ways to Break Out of a Gaming Rut

It happens to us all, even with games we absolutely love. Sometimes, you just get TIRED of a game…it doesn’t seem to have the same level of challenge and fun that it used to. Whether the game is on a disc, online, or played on a tabletop, sometimes we just lose interest–it seems we’ve conquered everything.

But wait! Before you sell off that game disc, close out your online account, or trade away all the game pieces, take a moment to rethink. You might not be “done” with the game–you might just need a new perspective on it.

Perspective Change #1: Observe How Others Play

Once you’ve been playing a game for a long time, you can get set in certain ways of playing. You might set up your item inventory the same way all the time, or you might play certain card combos in exactly the same way. All that sameness is very comfortable, but it can also be…boring.

To start shaking up your gaming experience, simply watch other people play the game, and take note of how they do things differently from you. This works even better if you’ve lent them your game/game pieces–for instance, how do they play that Heroclix piece differently from you? What can you learn from their approach? Just taking time to appreciate another’s gaming style as opposed to your own can help you feel less bored about the game.

Perspective Change #2: Try Something New in the Same Old Game

I’m quite guilty of choosing the same character or same playstyle all the time, especially when it comes to fighting games. It’s hard for me to learn a different character’s fighting style when I’ve gotten so used to mashing X for a jump attack or A and B together for a super-punch, and so on. But choosing a different character or playstyle can be just the ticket to refreshing your interest in the game–you just have to be willing to be a “newb” again.

What do I mean by “being a newb?” I mean starting with a playstyle you’re not familiar with at all–trying something completely off-the-wall, something that goes against your traditional choice. It might be difficult at first, but think of it as a new challenge in an old game. (For instance, if you have only played Red decks in Magic: the Gathering, how about trying a Blue or White deck?) Also, ask other players for advice as you try new things; it’s not a cardinal sin, and you might just revive their interest in the game, too!

Perspective Change #3: Teach a Newbie

Not all of us are natural teachers, but you can at least demonstrate the game to a person who’s interested in playing. Show them your favorite parts of the game–if it’s a video game, show them your favorite area of the game, or your weapons/items of choice, for instance. Tell them why you enjoyed these bits of the game so much, and what drew you to these items, etc.

As you show the new player these game features, take time to observe their reactions, and really listen to their questions. For them, this is all uncharted territory–it’s all new and exciting! Allow this attitude of discovery to rub off on you; see your old “boring” game through their eyes. Who knows, they might discover something new about the game or point out a challenge you never knew was there. Remember the old adage about “seeing things with fresh eyes?”

Summary

Gaming ruts don’t have to last forever! With these tips, you might just find a whole new gaming experience hiding underneath all that boredom. Give them a shot!

“So What?” The Silly Question That Can Polish Our Writing

As writers, when we get all wrapped up in a plot idea or go crazy with character development, sometimes the words flow out as if we’re erupting, with lava-hot paragraphs cascading down the page at a blazing speed. Who cares if this sentence isn’t written the best or has a few misspelled words, for instance–the plot must go on!!

But once our writing ardor has cooled, once the mental volcano of literary inspiration has settled back down, we must go back and critically examine our work, beginning to shape the raw flows of words into art. This can be INCREDIBLY daunting–I should know, I’ve been doing this intermittently on my novel for several months. I know well that it gets difficult to cut away some of your most fervent words, some of the awesome sentences that arose out of the huge head of steam you had when you first wrote this paragraph or that page.

So how do you do it? Simple: with every paragraph, every sentence, ask yourself:

SO WHAT?

Yes, It Actually Works–You Just Have to Be Honest

You might be surprised that such a simple, silly-sounding question could help you know what to cut and what to keep in your writing. But it really does. Ask yourself “so what?” after every paragraph, sentence, or even word; ask yourself whether that part of your writing REALLY needs to be there in order to impart your meaning.

When you ask yourself “So what?” about your own writing, it’s tempting to be light-handed with criticism. Don’t. Be ruthless if you have to; dare to see your writing as a reader will. You are the artist of this written work–you have a responsibility to produce the best quality writing you can.

An Example

Here’s an example paragraph I wrote to demo this process:

“The fabric of her dress shimmered faintly in the moonlight. It looked silken, inexplicably heavy on her slight frame–she looked almost overwhelmed with the folds of blue-green fabric. On this muggy, uncomfortable night of about 80 degrees, who would wear such a dress except for those who were rich enough to have a cool shelter to retreat within?”

Start the “So What?” Process

The above paragraph is pretty good. Now, I have to dig into it, tear it apart a little bit, and see how I can make it even better.

“The fabric of her dress shimmered faintly in the moonlight.” So what?

  • Adds atmosphere
  • Gives hints of the setting
  • Phrased somewhat poetically, could be tightened up a bit

“It looked silken, inexplicably heavy on her slight frame.” So what?

  • Does the detail of the dress fabric have to be explicitly stated?
  • The last part of the sentence gives more hints about the character–good

“She looked almost overwhelmed with the folds of blue-green fabric.” So what?

  • More character information, but this could be folded into the previous bit of description
  • There has to be a better word for describing the color, and a synonym for “fabric”–or maybe take that out altogether?

“On this muggy, uncomfortable night of about 80 degrees, who would wear such a dress…” So what?

  • Don’t need the “of about 80 degrees” part–too specific/scientific
  • “Muggy” automatically conjures up “uncomfortable”–can trim that if need be
  • “who would wear such a dress”–implies a narrator’s judgment

“…except for those who were rich enough to have a cool shelter to retreat within?” So what?

  • More narrator judgment–negative in tone, so it provides a little drama
  • Moves the story along to the next paragraph
  • Can we get rid of the preposition at the end of the sentence? Please? LOL

The Result: A Better Paragraph (IMO)

Okay, now I have an idea of how I want to rewrite it…so I take my own advice, and reshape the paragraph entirely. Here’s my second draft as the “result” of this process:

“Her dress, with all its silken, heavy turquoise folds, shimmered faintly in the moonlight as it draped on her, just as the muggy air hung over all of us. On such an uncomfortable night, who would wear such a gown, except for those who were rich enough to have a cool shelter in which to retreat?”

I think this paragraph says more in less space, which is always good from a reader’s standpoint; the scene is, if possible, even more described now. I also think the phrases and sentences are a little bit more graceful and “finished”-sounding than the first draft. (But, as always, writing is subjective–which paragraph did you like best?)

Summary

When you take time to revisit and rewrite your own writing, you have to be honest about each word, each paragraph, each page. Asking yourself “So what?” after each section of your writing will alert you to ill-chosen words, weird extraneous information, and anything else that could distract your reader from your amazing plot and characters. It just takes being willing to step back from your work a bit and really seeing your writing for what it is, aside from being your hard work.

“Jumpy” Hover Borders on Image Links: Solved At Last

Over at CSS-Tricks.com, I spied an article that spoke directly to one of my infamous webdesign flaws over the years–making all my image links have a:hover borders.

Why would I call this a “flaw?” Well, unfortunately, when you give anything on a webpage a border under some circumstances and not others, it can create a “jumpy” layout look–for instance, when you hover over image links on my blog, they get a border underneath them, which makes other page content shift a little downwards on the page until you mouse off the image.

This is the “image rollover border” effect, and it can make your page look REALLY amateurish…as I well know. 🙁 It’s been bugging me for years on this blog and all my other sites–I love how the hover border looks on text links, but I hate the way it makes other things on the page “jump” a little!

Making Non-Jumpy Rollover Borders for Images

The CSS-Tricks article does a wonderful job of explaining exactly why all this happens, as well as offering some solutions for how to incorporate a “bordered” hover look for your images without getting layout shifts. Several methods, including negative-margin borders, are suggested and diagrammed for you.

Getting Rid of Image Hover Borders Altogether: Mission Impossible?

But what if you don’t want borders around your images at all? Preferably, I would like my text links to have the border-bottom property on hover, while my image links would be without that dumb-looking border.

So I started looking into how to get rid of the hover border on just my images, thinking it would be pretty easy. All I’d have to do is use a little bit of CSS like so…

img {border: none;}

…and I’d be good, right?

WRONG. Wrong wrong wrong. That didn’t work, and nor did the other iterations I tried, such as:

a:hover img {border: none;}
img a:hover {border: 0px;}

I tried everything I had in my mental CSS toolkit to solve this. No luck. Then I decided to Google it, wondering if I was the only webdesigner who was having this issue. “After all, it’s probably a really simple fix,” I thought.

Turns out, I’m not the only webdesigner who has had difficulty with it, and it is most definitely NOT an easy fix. The only real “fix” for this problem comes in two similar flavors:

Fix #1

Fix #2

Give all your image links a specific CSS class, and reference it every time you have an image link in your document. Get rid of the CSS that creates a hover border entirely.

Fix #1’s CSS

Make a specific CSS class for all the links that will be wrapped around images…

.imglinks a {border: none;}

…and implement it every time you have an image link (place the code in the link tag rather than the image tag):

<a href=”your link here” class=”imglinks”><img src=”your image filename here”></a>

The Problem with Fix #1

If you have a large site, or you run any sort of blog software to make your site, Fix #1 is just not going to be worth your time. You would have to physically go back and edit EACH image link throughout your ENTIRE site to completely implement this fix. I have almost 800 blog articles on this site already, and I can’t imagine going back and editing each of those image links in all those articles to make them not have a hover border anymore.

But if you have a small site or don’t run any blogging software, Fix #1 will work beautifully for you, provided you have the patience to change all your image links.

Fix #2’s CSS

Anywhere you see CSS code like this that would hit any images on your page…

a:hover {border: 1px solid #000000;}

…change it to:

a:hover {border: 0px;}

This will fix all your image links, but it will also take away any borders from your text links as well. It’s a quite ham-handed fix, but it gets rid of “jumpiness” on your page. (Note: Make sure you make your hovered links look different enough from regular text without the borders–different color, etc.)

This is a better option, albeit a less graceful one, for larger sites or sites that run blogging software. For certain, it saves you some gray hairs and gnashing of teeth. XD

For Further Reading

The following forum threads discuss this problem in greater detail, and helped point me toward the fixes I have detailed above:

Remove a:hover for images? @ StackOverflow.com
Getting Rid of a:hover on Images @ Sitepoint.com
CSSBeauty Discussion on A:Hover Borders

Struggling Writer? Here Are Sites That Can Help!

Writing can often feel suspiciously like banging your head against a wall of your own thoughts–thoughts which are unhelpful and keep getting in the way of real creative work. And when you’re struggling through a rough patch of writing, it can feel as if you’re the only writer who has ever gotten stuck like this.

Well, believe me, the Internet is full of writers who have all been there. And what’s more, plenty of them have made websites to help their fellow writers get un-stuck and back on the road to a finished work. See the following sorted list to get restarted on your own writing journey!

Social Networks for Writers

WritersCafe.org
Writing.com

Grammar, Style, and Structure Help

Grammarphobia Blog
Chicago Manual of Style
Banned for Life (about overused cliches)
GrammarBook.com
The Phrase Finder
Grammar Girl
The Word Detective

Fun Online Writing Exercises and Tools

Language is a Virus
Fifteen Minutes of Fiction
WriteForTen
750Words
Wordsmith.org
Libroville (make your own writing website in minutes)

Helpful Articles about the Writing Process

WritingForward
WriteToDone
Vocabula
Daily Writing Tips
The Writing Corner

Contests and Getting Published

WritersDigest
Winning Writers
ForWriters.com
AgentQuery.com
FirstWriter.com

Custom Trading Cards as a Memory Tool

If you’ve ever had difficulty with memorizing information of any type, you’re likely familiar with using flashcards to help you learn it. But what if you have more information you need to remember, or very detailed information? You don’t want to have to write out a flashcard chock-full of information, after all!

One solution: make trading card flashcards!

The Process

Over at ReadWriteThink.org, they’ve got a cool little trading card creator (suitable for kids, but usable for adults, too) that can make trading cards about all sorts of subject matter. See below:

tradingcard_startscreen
Simply enter the name of what you’re creating the card for, then choose the category it falls in…

tradingcardcreator
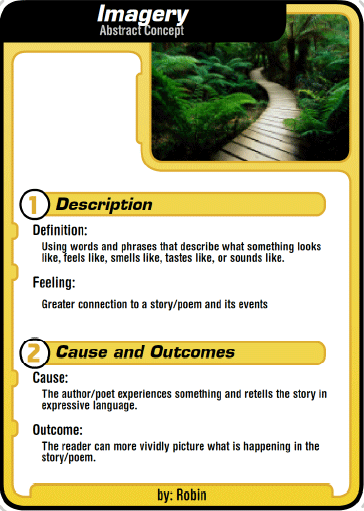
…and fill in the answers to the questions presented to you. Click the right arrow at the bottom right of the screen to advance, and the left one to go back; you can add a suitable picture at the end of the card-making process. (In this example, I’m making a card about the literary concept of imagery.)

The Custom Trading Card and How to Use It

imagery_front
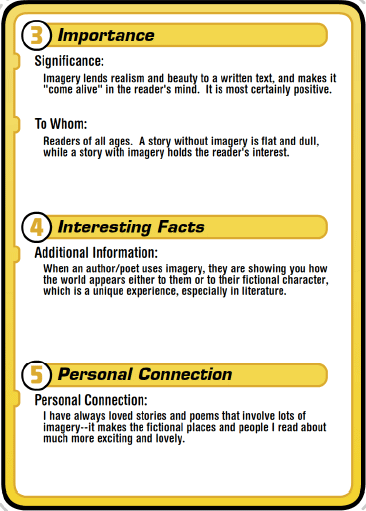
imagery_back
Here’s the finished product–a card that details what imagery is! Once you’re done with your card, you can save it as a PDF file, print and cut it out, and assemble it with tape. (Or you can just leave it as a digital file for reference, if you’re lazy like me, xD)

Where Else Can You Use This?

I like this idea for school group projects and for memorizing specific concepts for essay tests, of course. But I also like the idea of using this for remembering how to do creative projects (like how to put a lobster clamp on a beaded necklace, or how to make various paper projects). And it could be a good way to remember directions to a friend’s house, or for your child to remember their address and phone number!

I think this trading card creator could also be useful for remembering settings, characters, and plot details of a book you’re writing. HMMM…I might just need to mock up a few cards for my novel, now!

To Make Your Own Flashcards:

Trading Card Creator @ ReadWriteThink.org

A Most Useful Meme: Actual Advice Mallard

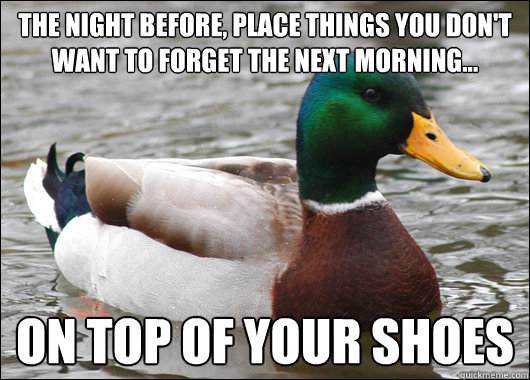
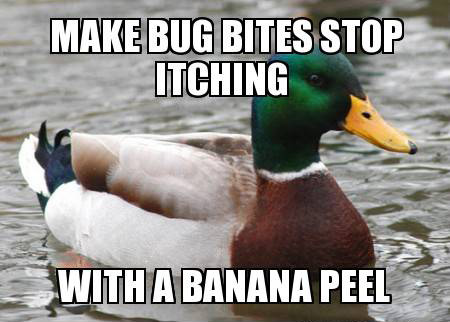
With the emergence of so many new memes across the Internet, it can be hard to pick out the best and brightest. One that I think deserves a lot more recognition is the “Actual Advice Mallard” meme–each one contains clever and useful life advice, a life hack, or a handy tip to make things easier, printed on a picture of a green-headed (male) mallard duck.

Here are just a few samples of Actual Advice Mallards from across the Internet:
adviceduck_1

adviceduck_2
This REALLY works, and not just for pizza–it works for any food that you want to rehydrate after a night in the fridge!

adviceduck_3

adviceduck_4

adviceduck_5

adviceduck_6

adviceduck_7

adviceduck_8

adviceduck_9

adviceduck_10
Very, VERY wise words…

adviceduck_11
(Important note: Check the Wikipedia page’s sources and make sure they are reliable and trustworthy before putting them on your source list–the content of your paper is far more important than not sourcing Wikipedia in your bibliography. This advice brought to you by a former English teacher.)

adviceduck_12
(Also known as: Don’t argue back while your parent is talking.)

adviceduck_13

adviceduck_14

adviceduck_15
Such appropriate advice for our time.

adviceduck_16

adviceduck_17
I’ve tried this fix, and it absolutely works–I’ve got two pairs of pants I’ve fixed with this advice.

adviceduck_18

adviceduck_19

adviceduck_20
Very important, especially while outside in direct sunlight!

adviceduck_21
Steam, also known as “the lazy person’s iron.” LOL

adviceduck_22
This needs to be plastered on every road billboard in my town.

adviceduck_23
From experience, I can say AMEN to this!

adviceduck_24

adviceduck_25
For all us job seekers out there!

adviceduck_26
SUCH TRUTH

adviceduck_27

adviceduck_28
I’m going to print this and put it in my wallet…XD

adviceduck_29
I can’t believe I never thought of this!

adviceduck_30
Something to keep in mind, especially for the summer months here in the Southeast!

adviceduck_31
Never knew about this little keyboard shortcut!

For More Actual Advice Mallard:

(Warning, some Actual Advice Mallards may have curse words)

Actual Advice Mallard @ Tumblr
Quickmeme
Memestache
Memebase

4 Ways to Be a Kid Again (For 5 Minutes)

As a kid, I always thought I had it pretty rough in terms of school responsibilities. That was, of course, before I grew up and found that out in the “real world” lay tons more responsibilities, more than I could have ever dreamed. Being grown-up can be very, very stressful…no wonder we’re all medicated and in therapy these days!

So, instead of trying to medicate our stress away, how about we approach it a little more creatively? How about we access some of that crazy kid energy we used to have? It’s actually still there, if we take the time to tap into it.

Create a Crazy Masterpiece…in MS Paint

Remember when art was fun, not something you worried over? Remember when the coloring of a single page in a coloring book could consume your whole being till it was done? We may not have coloring books for adults, but we have software programs that can stand in.

mspaint_1
Start off by drawing something like this, just wild and crazy lines streaking across the image…

mspaint_2
Then add a little color, whatever color you want and wherever it ought to be…

mspaint_3
Keep going, focusing only on the task at hand, till you either get tired of it or you’re finished! If you get tired of it or want to start anew, no problem; if you finish it and yet don’t want to save it, no worries–kids crumple up drawings and restart all the time. (And who knows, you might just inspire yourself with the random art you create!)

Go Outside for No Reason

Kids always seem to be drawn like magnets toward the outdoors, but as adults, we somehow lose that desire to be out and about as much, especially if it doesn’t have anything to do with our jobs or our more “grown-up” relaxation time. More of us end up staying indoors where the technology (and the to-do lists) reign.

So, how about just going outside, for absolutely no reason other than to be outside? Feel the air temperature, breathe a little easier, and just be open to whatever you discover. “Enjoying the day” doesn’t have to be part of a vacation itinerary, nor does it have to be penciled in on your calendar. It can happen any time, any day you want or need it to happen. For most of us, just taking time to see the actual environment we live in would be a revelation of senses. This is not necessarily about “getting in tune with Nature,” but about experiencing the physical world around us rather than being locked in our own mental world full of deadlines and other “grown-up” stuff.

Make Up a Silly Game

In childhood, almost anything could be made into a game–remember that? We didn’t need hardly anything to create a game of our own, either to play by ourselves or to play with others. Making super-long chains of paper clips to stand in as “jump ropes” (I remember doing that–it was kinda successful, LOL), or wadding up great quantities of paper and rubber bands to make monstrous, lumpy creations that were sort of like baseballs to throw around…and making up rules as you go along, like “You can only jump over the paper-clip chain 3 times, and then you have to toss the paper ball as far as you can.”

These days, it can be hard for us to think about making our own games when so many fun technology-based games exist. But what about turning everyday tasks into little games? Like Mary Poppins said, “in every job there is an element of fun–you find the fun, and SNAP! the job’s a game!” Challenge yourself to Housecleaning Games, where collecting the most trash in the fastest time gets you points–and even more points for collecting it with style. Or turn your daily to-do list into a game where every item is a “level” to be conquered. It doesn’t matter what the game is or what the prizes are–sometimes, the prize can be in the creation of the game itself!

Imagine Something Outlandish

As children, we are taught that imagination is wonderful; as adults, we learn that imagination is “not company policy,” “not the way things are done around here,” etc. Sometimes that can really leave us stymied when it comes to creativity–we constantly self-censor and push aside the most wildly creative impulses as being “too childish.”

So, to let that childlike creativity out to play again, try the following trick: Imagine that a character from your favorite TV show/book/movie is doing something totally and hilariously out of character. Where does that action take him/her? What happens when other characters from the TV show/book/movie see or hear about this? (Here’s my example: Cinderella becomes a punk rocker and writes songs about her stepmother and stepsisters.)

Follow this story out as long as possible, adding details, making it as outlandish and funny as you want. Even when it gets kind of “awkward,” keep pursuing it–this is how you let your inner child free!

Summary

All of these ideas might sound a little silly to us “grown-ups.” But then again, we used to revel in being silly, and we had a whole lot more fun back then. We don’t have to completely give up our adult life, but we can put it aside just for a few minutes, to get back a little childlike joy. Isn’t that worth trying?

5 Useful Writing Inspirations

As a novelist who often feels “stuck” because of certain writing hang-ups, I know that sometimes writer’s block feels like a steel trap caught around the leg of your plot, refusing to let it go anywhere. I think sometimes we writers psych ourselves into a state where we can’t even write because we’re afraid of what will come out of our heads–afraid it won’t be “good enough,” somehow.

Thus, I came up with the following 5 simple tips, which have helped me begin to break through the ice covering my novel; I hope they will help you begin to write again, too.

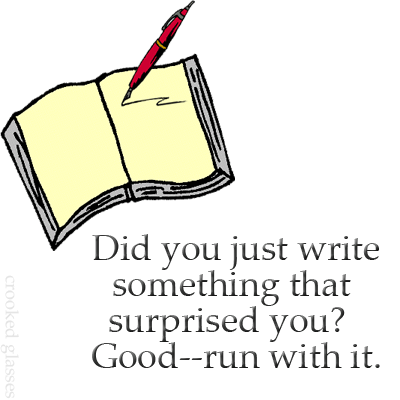
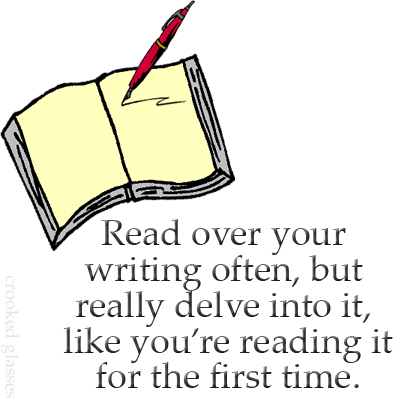
writinginspiration1

writinginspiration2

writinginspiration3

writinginspiration5

writinginspiration4

Image Credits: Source of image of book with pen

Transform Unwanted Shampoo/Shower Gel into Foamy Hand Soap!

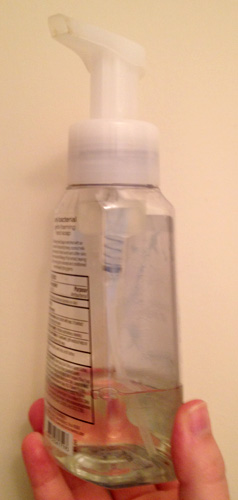
foamysoap Recently, as I purged my bathroom of all sorts of old shower gels and shampoos, I realized I had quite a little collection of almost-but-not-quite-used-up bath products. Most of them were a bit old to continue using for their original purpose, but, being the borderline hoarder that I am, I didn’t like to see wads of money going in the trash can if I could repurpose the leftover products for any other household use.

I was quite at a loss, till I discovered that there was a way to make your own foaming soap using some of these unwanted products. Yes, you read that right–your own foamy soap, without having to go out and buy it! With this process, I’ve been able to both use up leftover products AND save money on hand soap…a definite win-win!

The Process

(There are many blog articles about this out there on the Internet, but the tutorial I followed was this one over at KingdomFirstMom.com. I have added my own tips and advice to this, gained through trial and error.)

  1. First, only use shower gels/shampoos that are see-through for this project. If it’s not a see-through product, it will not foam well at all, AND will gunk up your foamy soap dispenser to boot. (Learn from my fail.)
  2. Make sure your foamy soap dispenser is rinsed out completely.
  3. Measure out 1-2 tablespoons of your chosen product and pour it into your dispenser bottle.
  4. Run a very thin stream of warm water into the dispenser bottle until the bottle is filled up almost all the way to the top, leaving room for the foamy dispenser top to fit in.
  5. Screw the top of the bottle on firmly, and then begin to turn the bottle over and over in your hands slowly to combine the soap and water. (This is important–if you shake the bottle too hard, all the foam will be “stuck” in the bottle and won’t come out the top. Learn from my fail.)
    • I find that turning the bottle over to the rhythm of “thousand-1, thousand-2, thousand-1, thousand-2” works well.
    • Turning the bottle end-over-end ensures that the product distributes throughout all the water in the bottle.
  6. After a few minutes of this slow-churned process, try out your foamy soap by pumping the top a couple of times. (If it doesn’t foam right at first, try a few more pumps, or shake the bottle up a teensy bit faster–some shampoos and shower gels distribute at different rates in water.)
  7. YAY! You have your own foamy soap, made from a repurposed product!

One Final Note: Obtaining a “Foamy Soap” Bottle

The real trick to making anything into “foamy soap” is the bottle, or more accurately, the top of the bottle, which adds air into the soap/water mix as you pump it out of the bottle. There are some fillable foaming soap pumps out there, but most of them have really bad reviews, either for being leaky or for the foamy dispenser part clogging up really easily.

At our house, we had several empty Bath & Body Works foaming soap bottles and pumps lying around; I just rinsed one out and repurposed it for my “homemade” foamy soap. This has worked out really well! So, if you can’t find a foamy soap pump you like, you may want to ask friends if they have any empty storebought soap pumps they’d be willing to let go. One less item of clutter/trash for them, one very cheap way to stretch soap for you!

3 Tips to Revolutionize Your Creative Writing

After having been stuck on my novel for the better part of a year, I knew I had to do something to light the spark again. I looked at all I’d accomplished so far, and I found myself asking, “How in the world did I ever get to 50,000 words, let alone 150,000, when these days I can barely be bothered to come up with 500?”

You might feel just as stuck in your own creative writing process. It may feel as though those cogs and gears will never turn again, that they are rusted into place. But I have 3 tips that have helped my own writing engine begin to turn over, and they just might help you. It doesn’t hurt to try!

#1: Write What You Really Want To

You have to give yourself a compelling reason to write again once your engine has stalled out for a while. So, if you have an idea that’s simply bursting to come out of your head, write it down. It doesn’t matter if it has anything to do with your current projects or not; write it. If it’s a very future part of your novel, several chapters ahead of where you are now, go ahead and write it–you can connect the plot dots later. If it has nothing to do with anything you’re currently trying to write, go ahead and write it anyway; it’ll help keep those creative wheels greased.

For example, I have several ideas for future chapters of my novel–let’s say these are going to appear in Chapters 14 and 16. But right now, I’m stuck back on Chapter 7 or so. Very, very annoying! But I can go ahead and write those very far-flung chapters; who knows, it may spark an idea for how to finish Chapter 7, and how to build up chapters 8-14 to those next plot points!

#2: Don’t Make Writing a Chore, Make It an Escape

When something’s a chore, it’s not very fun, is it? We dread it, but we put it on our schedules in an attempt to make us do it. Yet many of us creative writers try to mold our writing schedule into “daily writing” programs, or try to follow those “write X number of words daily” plans…and we end up hating to write, where before we had loved it.

I don’t mean to disparage such motivational programs; if they work for you, then do them gladly. But for me, such programs create more anxiety than they solve; I end up anxious about not completing the programs or following the plans to the letter. And believe me, when writing gets associated with anxiety or boredom, you’re in deep trouble as a creative writer. That’s what I’ve run into with my own novel this last year–it’s not that my novel bores me, but that the situation I’m writing is hard to write about. I’ve become so anxious about “fixing” it that I have hobbled my writing ability. Sounds ridiculous, but it happened…and it happens to many more writers, I’d wager.

So, how to break free of this? Make your writing something you do when you need to wind down, something to reward yourself with when you’ve finished a real chore, or something you do when you want to cheer yourself up. Make it an escape, like a favorite book you can’t put down, a favorite food you look forward to eating, or a favorite place you love to visit. Make it FUN again, make it the process of discovery and creation that it ought to be, instead of hedging it about with tons of rules. If you’re like me and have problems following overly structured plans, this might just spark your engine again.

#3: Let Dreams Inspire You

Have you ever woken up from an incredibly intense dream, only to have certain scenes stick with you throughout the day? How about using these scenes as inspiration for your writing? Whenever you have dreams like this, write down the most vivid scenes from the dream in as much visual and sensory detail as you can remember–then save that scene where you can find it easily. You never know when that dream scene may become fodder for a future plot detail! (Being a pack rat is okay in this case!)

For instance, I dreamed a very powerful, evocative scene for a future subplot in my novel about a year ago–I actually woke up weeping and shaking, and it stayed with me for hours. I know it will be a very painful scene to write when I put it into my book, but it will also be a point of great character development, too. So I’ve written some quick notes about it and it’s sitting in my novel file on my computer, waiting to be used alongside a few other little scraps of dreams I’ve written down. The others may never make it into the book, but they just might!

Summary

I hope these three tips help your writing engine start again. Remember, just because it hasn’t cranked in a while doesn’t mean it won’t crank ever again. Unlike old cars, our brains are never rusted!